Skip to Content (Press Enter) Skip to Footer (Press Enter)

Cricut: How to Personalise a Trolley for Kitchen Storage

Level
Beginner
Time
1 hour
Budget
30+

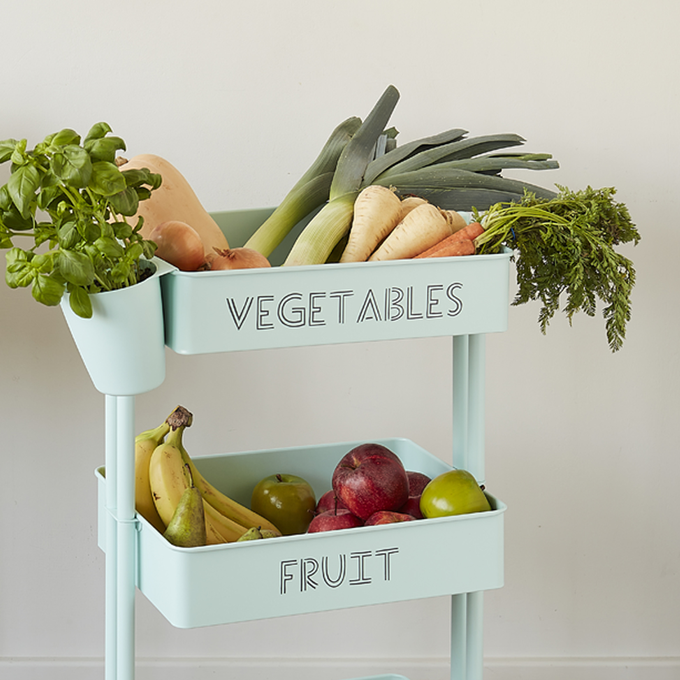
Enjoy extra organisation to your kitchen storage or pantry by adding stylish label details to one of our three tier trolleys. Store fruit and veg easily and conveniently, with a tray for each one – or adapt the label lettering to suit your requirements.

It's easy to use your Cricut machine to create vinyl lettering to decorate your food storage!

Please note: This project contains paid-for content from Cricut's Design Space app. Screen reference images are taken from the desktop version of Design Space. The Cricut Maker was used to create this project; however, this project can also be created using a Cricut Explore.

Project and instructions by Hobbycraft Artisan:

Chrissie Ellson

Find out more

You will need

7 products

Viewing 4 of 7 products

Is £399.00

Quantity: 1

Is £21.00

Quantity: 1

Is £9.00

Quantity: 1

Is £9.00

Quantity: 1

Is £25.00 , was £30.00

Quantity: 1

Is £7.50

Artisan Approved
Quantity: 1

Is £6.00 , was £12.00

Quantity: 1

You’ve viewed 4 of 7 products

You Will Need
* Cricut Machine
* Three Tier Trolley
* Cricut Basic Tools
* Cricut StandardGrip Mat
* Transfer Tape
* Permanent or Removable Vinyl
* Cricut Design Space app installed on a laptop, PC, Tablet or mobile device

How To Make

Step 1

Open Design Space and click “New Project”

how-to-personalise-a-trolley-for-the-kitchen-with-cricut---picture-1.png?sw=680&q=85
Step 2

Once in a new blank canvas click on “Shapes”

how-to-personalise-a-trolley-for-the-kitchen-with-cricut---picture-2.png?sw=680&q=85
Step 3

Select a square

how-to-personalise-a-trolley-for-the-kitchen-with-cricut---picture-3.png?sw=680&q=85
Step 4

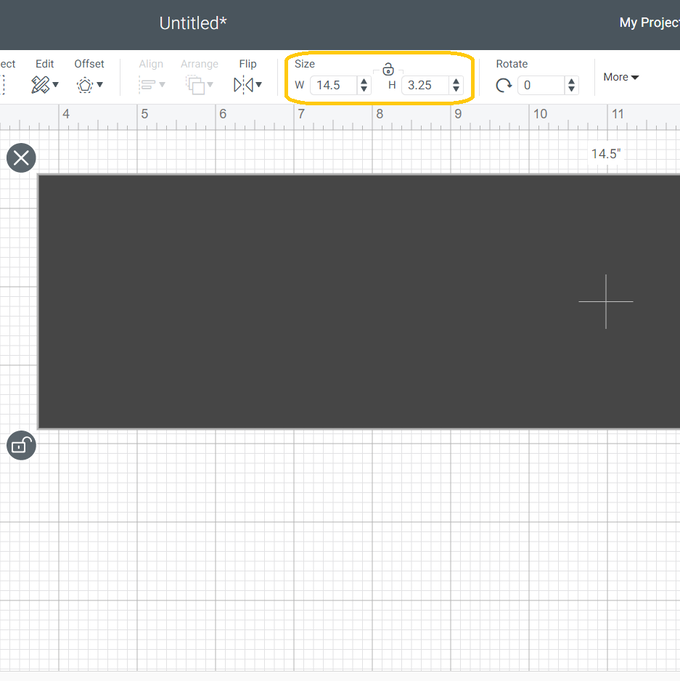
To resize your square to a rectangle the size of the side of your trolley first click open the “Padlock” icon

how-to-personalise-a-trolley-for-the-kitchen-with-cricut---picture-4.png?sw=680&q=85
Step 5

In the size section alter your measurements to 14.5” x 3.25” (or 36.8 x 8.25 cm if you are working metric. You will not be cutting this rectangle. It is just as a visual aid for resizing of your required design

how-to-personalise-a-trolley-for-the-kitchen-with-cricut---picture-5.png?sw=680&q=85
Step 6

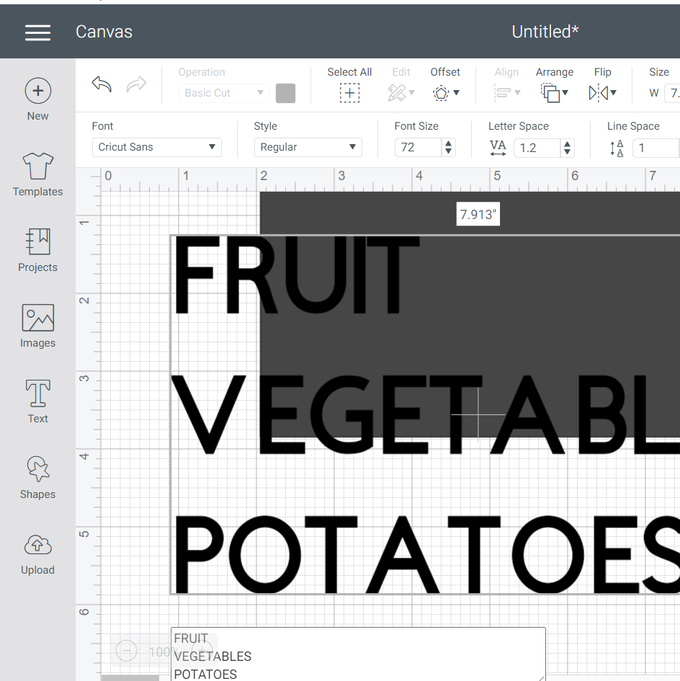
To insert your text click “Text”

how-to-personalise-a-trolley-for-the-kitchen-with-cricut---picture-6.png?sw=680&q=85
Step 7

Type your words

how-to-personalise-a-trolley-for-the-kitchen-with-cricut---picture-7.png?sw=680&q=85
Step 8

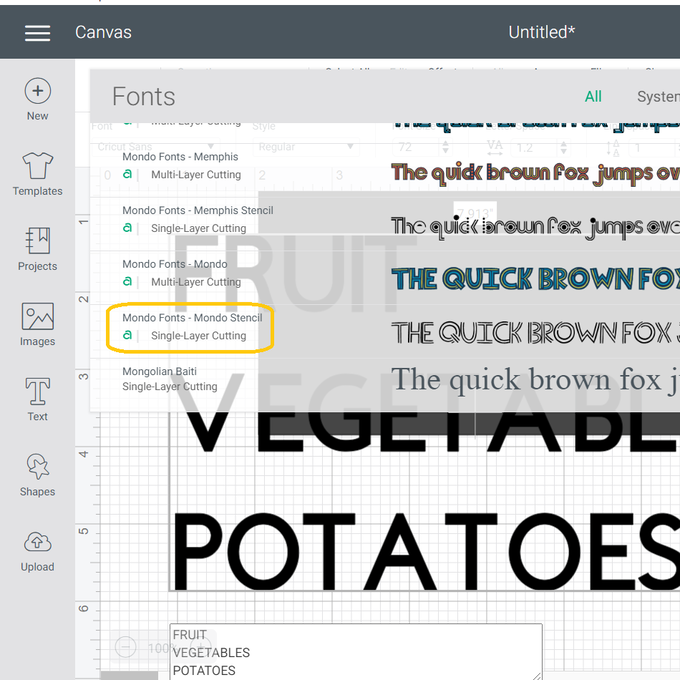
To change your font click the arrow in the font section and chose your font. I have used “Mondo Fonts – Mondo Stencil”

how-to-personalise-a-trolley-for-the-kitchen-with-cricut---picture-8.png?sw=680&q=85
Step 9

To resize your wording click on the double arrows and drag the text to your required size using your rectangle as a guide

how-to-personalise-a-trolley-for-the-kitchen-with-cricut---picture-9.png?sw=680&q=85
Step 10

When everything is set how you want it click “Make It”

how-to-personalise-a-trolley-for-the-kitchen-with-cricut---picture-10.png?sw=680&q=85
Step 11

Click “Continue”

how-to-personalise-a-trolley-for-the-kitchen-with-cricut---picture-11.png?sw=680&q=85
Step 12

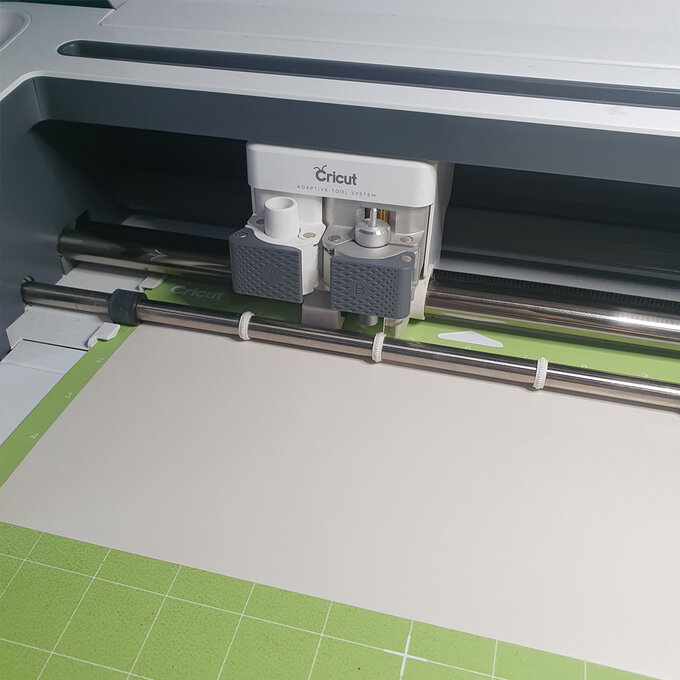
Select the correct settings for your chosen material. I'm using Premium Vinyl

how-to-personalise-a-trolley-for-the-kitchen-with-cricut---picture-12.png?sw=680&q=85
Step 13

Cut your vinyl

how-to-personalise-a-trolley-for-the-kitchen-with-cricut---picture-13a.jpg?sw=680&q=85
Step 14

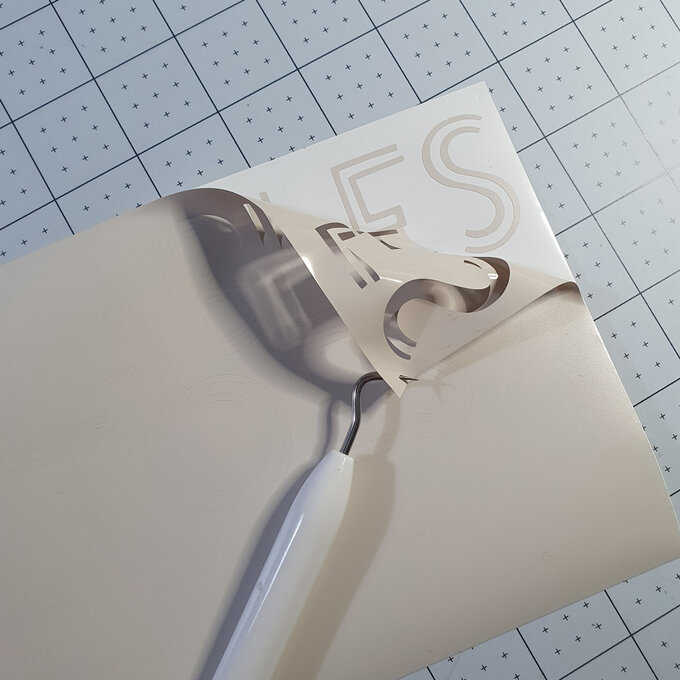
Weed your vinyl and then use transfer tape to transfer your vinyl to your trolley

how-to-personalise-a-trolley-for-the-kitchen-with-cricut---picture-14a.jpg?sw=680&q=85
null
how-to-personalise-a-trolley-for-the-kitchen-with-cricut---final-2.png?sw=680&q=85
  • bvseo_sdk, dw_cartridge, 18.2.0, p_sdk_3.2.0
  • CLOUD, getReviews, 4ms
  • reviews, product
  • bvseo-msg: Unsuccessful GET. status = 'ERROR', msg = 'Not Found.'; Unsuccessful GET. status = 'ERROR', msg = 'Not Found.';
  • bvseo_sdk, dw_cartridge, 18.2.0, p_sdk_3.2.0
  • CLOUD, getContent, 4ms
  • questions, product
  • bvseo-msg: Unsuccessful GET. status = 'ERROR', msg = 'Not Found.';

Related Products

Top
OSZAR »